
Workout Wednesday: 10-minute Medicine Ball Workout
November 27, 2013, 12:00AM
Fitness doesn’t take a holiday, even if you do. Your biology and your body don’t care how much you have to do to get ready for the holidays—you’re either sticking with fitness or not. Fortunately, it’s not as tough as you may think to stick with it.
First, just embrace the concept that you will be busy no matter what. If you skip workouts, you’ll still be busy and have a lot to do. Do you want to be “busy and fit,” or “busy and unfit?” Busy and fit, of course!
With a small investment of time, this 10-minute medicine ball workout can help you give your body a challenge that results in a large investment in yourself. This workout features some never-before-seen exercises I created just for this workout!
How to Do It:
- Use a 6- to 8-pound medicine ball (4- to 10-pound balls will work, too, if that’s what you have), and preferably one that bounces.
- Perform each exercise for 40 seconds, and take 15 seconds to transition between exercises.
- Repeat the five exercises two times.
The Exercises
- Plank Pinball
- Alternating Step Back Lunge With Spinning Toss
- Glute Bridge (with medicine ball under neck)
- Power Slam With Run-Under (or Run-Around)
- Alternating V-Up
Plank Pinball
From a plank position, start with the medicine ball under your hand and roll the ball to your opposite foot. Use the foot to pass the ball to the hand on the same side. Repeat until 40 seconds is up.
For example: L-Hand >> R-Foot >> R-Hand >> L-Foot >> L-Hand >> repeat pattern
Alternating Step-back Lunge With Spinning Toss
Gently spin and toss the medicine ball at the same time. In general, each time you catch the ball you will be looking at the back of your left hand and then your right hand. The ball will not move side-to-side, but will instead spin like a globe. As you spin the ball, perform an alternating step-back lunge. The spinning of the ball provides a strength challenge to the forearm and hand muscles; integrating it with the lunge provides a coordination challenge to smoothly integrate the upper- and lower-body movements.
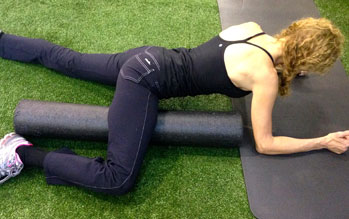
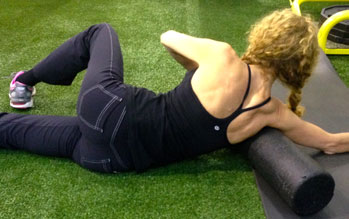
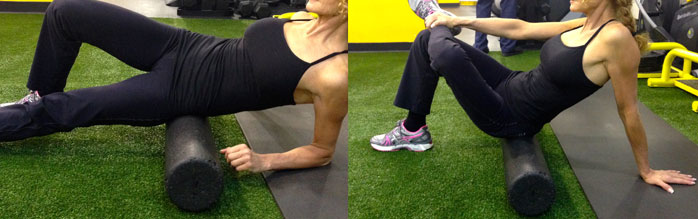
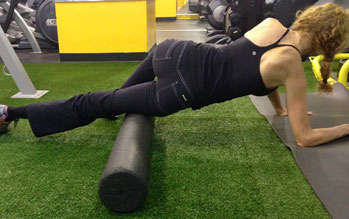
Glute Bridge (with medicine ball under neck)
Place the medicine ball at the base of your neck so that the curve of your neck matches the curve of the ball. From this position keep your head relaxed and resting on the ball. Perform a glute bridge by first rolling up the hips and then the spine. By focusing on rolling the hips and spine up and down, you are more likely to use the glutes for the exercise and less likely to have the low back work harder than it should.
Power Slam With Run-Around Or Run-Under
Perform the “run-under” version if you: (1) do not have a ball that bounces, or (2) cannot get your slam high enough to give you time to run under it.
Run-Under Version: Perform a power slam and while the medicine ball is in the air, quickly run under it, turn around, catch the ball and perform the next slam.
Run-Around Version: Perform a power slam and laterally shuffle around the ball until you are standing opposite from where you started. Catch or pick up the ball, and perform the next slam, reversing the direction of your lateral shuffle to return to where you started.
Alternating V-Up
Lay on your back and hold the medicine ball in your hands with arms and legs extended. Using the abs, lift your arms and legs simultaneously. As you get to the top and start to lower the legs, gently place the ball on your shins and lower the arms and legs. As you raise up for the next rep, either catch the ball or pick up the ball with your hands and keep alternating from there.
This exercise is challenging to both body and mind, as it requires big energy and considerable coordination. It will take some practice, but you will be so excited when you master it—and that’s part of the fun!
Final Thoughts
Celebrate this time of year by making your body better with both movement and good-tasting, high-quality food. Too often, there is a mindset of using exercise to work off all the desserts we will consume at the holidays. On behalf of your body, your health and your future enjoyment of physical activity, I’m challenging you to adopt a different mindset. One that has exercise and the food choices you make pointing in the same direction—a better you.
Exercise will never work as punishment for bad food choices. Your body’s ability to respond to exercise the way you want it to is directly affected—for better or worse—by the foods you give it.
The trick is to avoid denying yourself foods that you want to eat (that’s miserable), and instead learning to develop a desire and want for healthier food so there is no sense of deprivation. Learning to enjoy positive, health-promoting foods and activities, even during times of celebration, will transform the way you live and the way you spend the holidays.
 By Jonathan Ross
 To manage weight, you need to determine the number of calories you eat and the number of calories you burn. Your body has something called the basal metabolic rate (BMR), which is the amount of calories you burn at rest in order to survive. It accounts for roughly 60 to 75% of all the calories you burn in a given day. That’s right—you are actually burning a small amount of calories while you are sleeping.
 By Christopher McGrath
 If you think you can’t get your workout into your day because of work—think again. If you are skipping your workouts due to a busy job and sitting in an office all day, that’s a double sedentary whammy. Sitting too much is detrimental to your health and can increase your risk for a cascade of health ills including obesity, high blood pressure, diabetes, cancer, and depression. Even a little is better than nothing. Here’s how to get a workout at work. Try one of these ideas: